布局,清单文件
Activity
关于R类
Android在打包时,通过AAPT工具,对主工程和引入的依赖里的所有资源文件进行编译压缩,并会对res/里的资源文件如drawable、layout、values等生成唯一的id,同时生成R.java文件,保存所有的id值,以及生成resource.arsc文件,建立id对应资源的值(如string)或文件路径(如png)的关系表。
R
1
2
3
4
5
6
7
8
| public class MainActivity extends AppCompatActivity {
@Override
protected void onCreate(Bundle savedInstanceState) {
super.onCreate(savedInstanceState);
setContentView(R.layout.activity_main);
}
}
|
布局文件
1
2
3
4
5
6
7
8
9
10
11
12
13
14
15
16
17
18
19
| <?xml version="1.0" encoding="utf-8"?>
<LinearLayout xmlns:android="http://schemas.android.com/apk/res/android"
xmlns:app="http://schemas.android.com/apk/res-auto"
xmlns:tools="http://schemas.android.com/tools"
android:layout_width="match_parent"
android:layout_height="match_parent"
tools:context=".MainActivity"
android:background="#ff0000">
<TextView
android:layout_width="wrap_content"
android:layout_height="wrap_content"
android:text="@string/fuck_you"
app:layout_constraintBottom_toBottomOf="parent"
app:layout_constraintLeft_toLeftOf="parent"
app:layout_constraintRight_toRightOf="parent"
app:layout_constraintTop_toTopOf="parent" />
</LinearLayout>
|
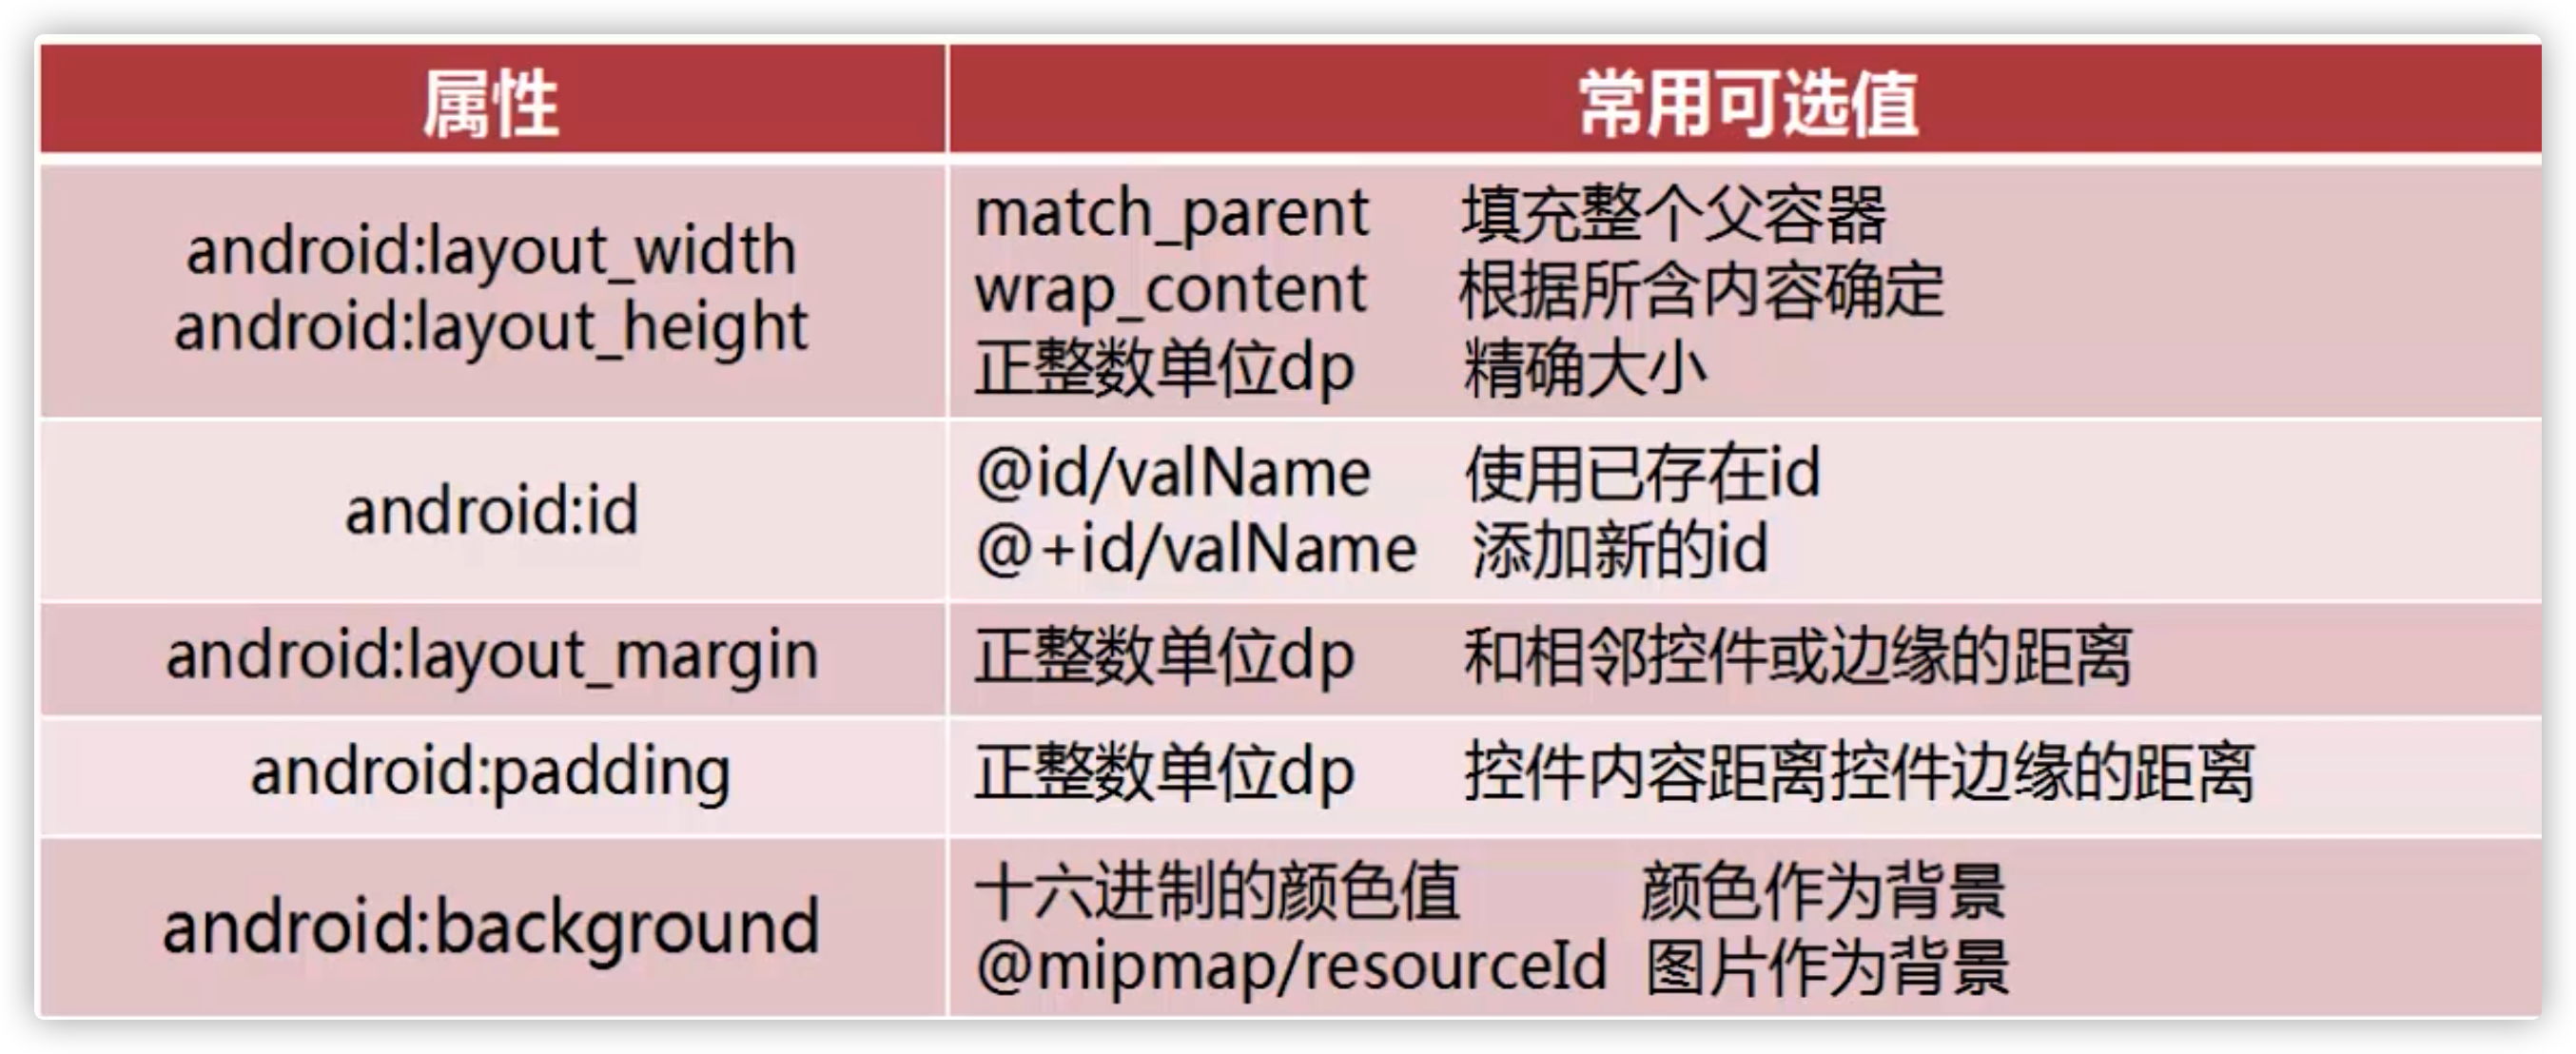
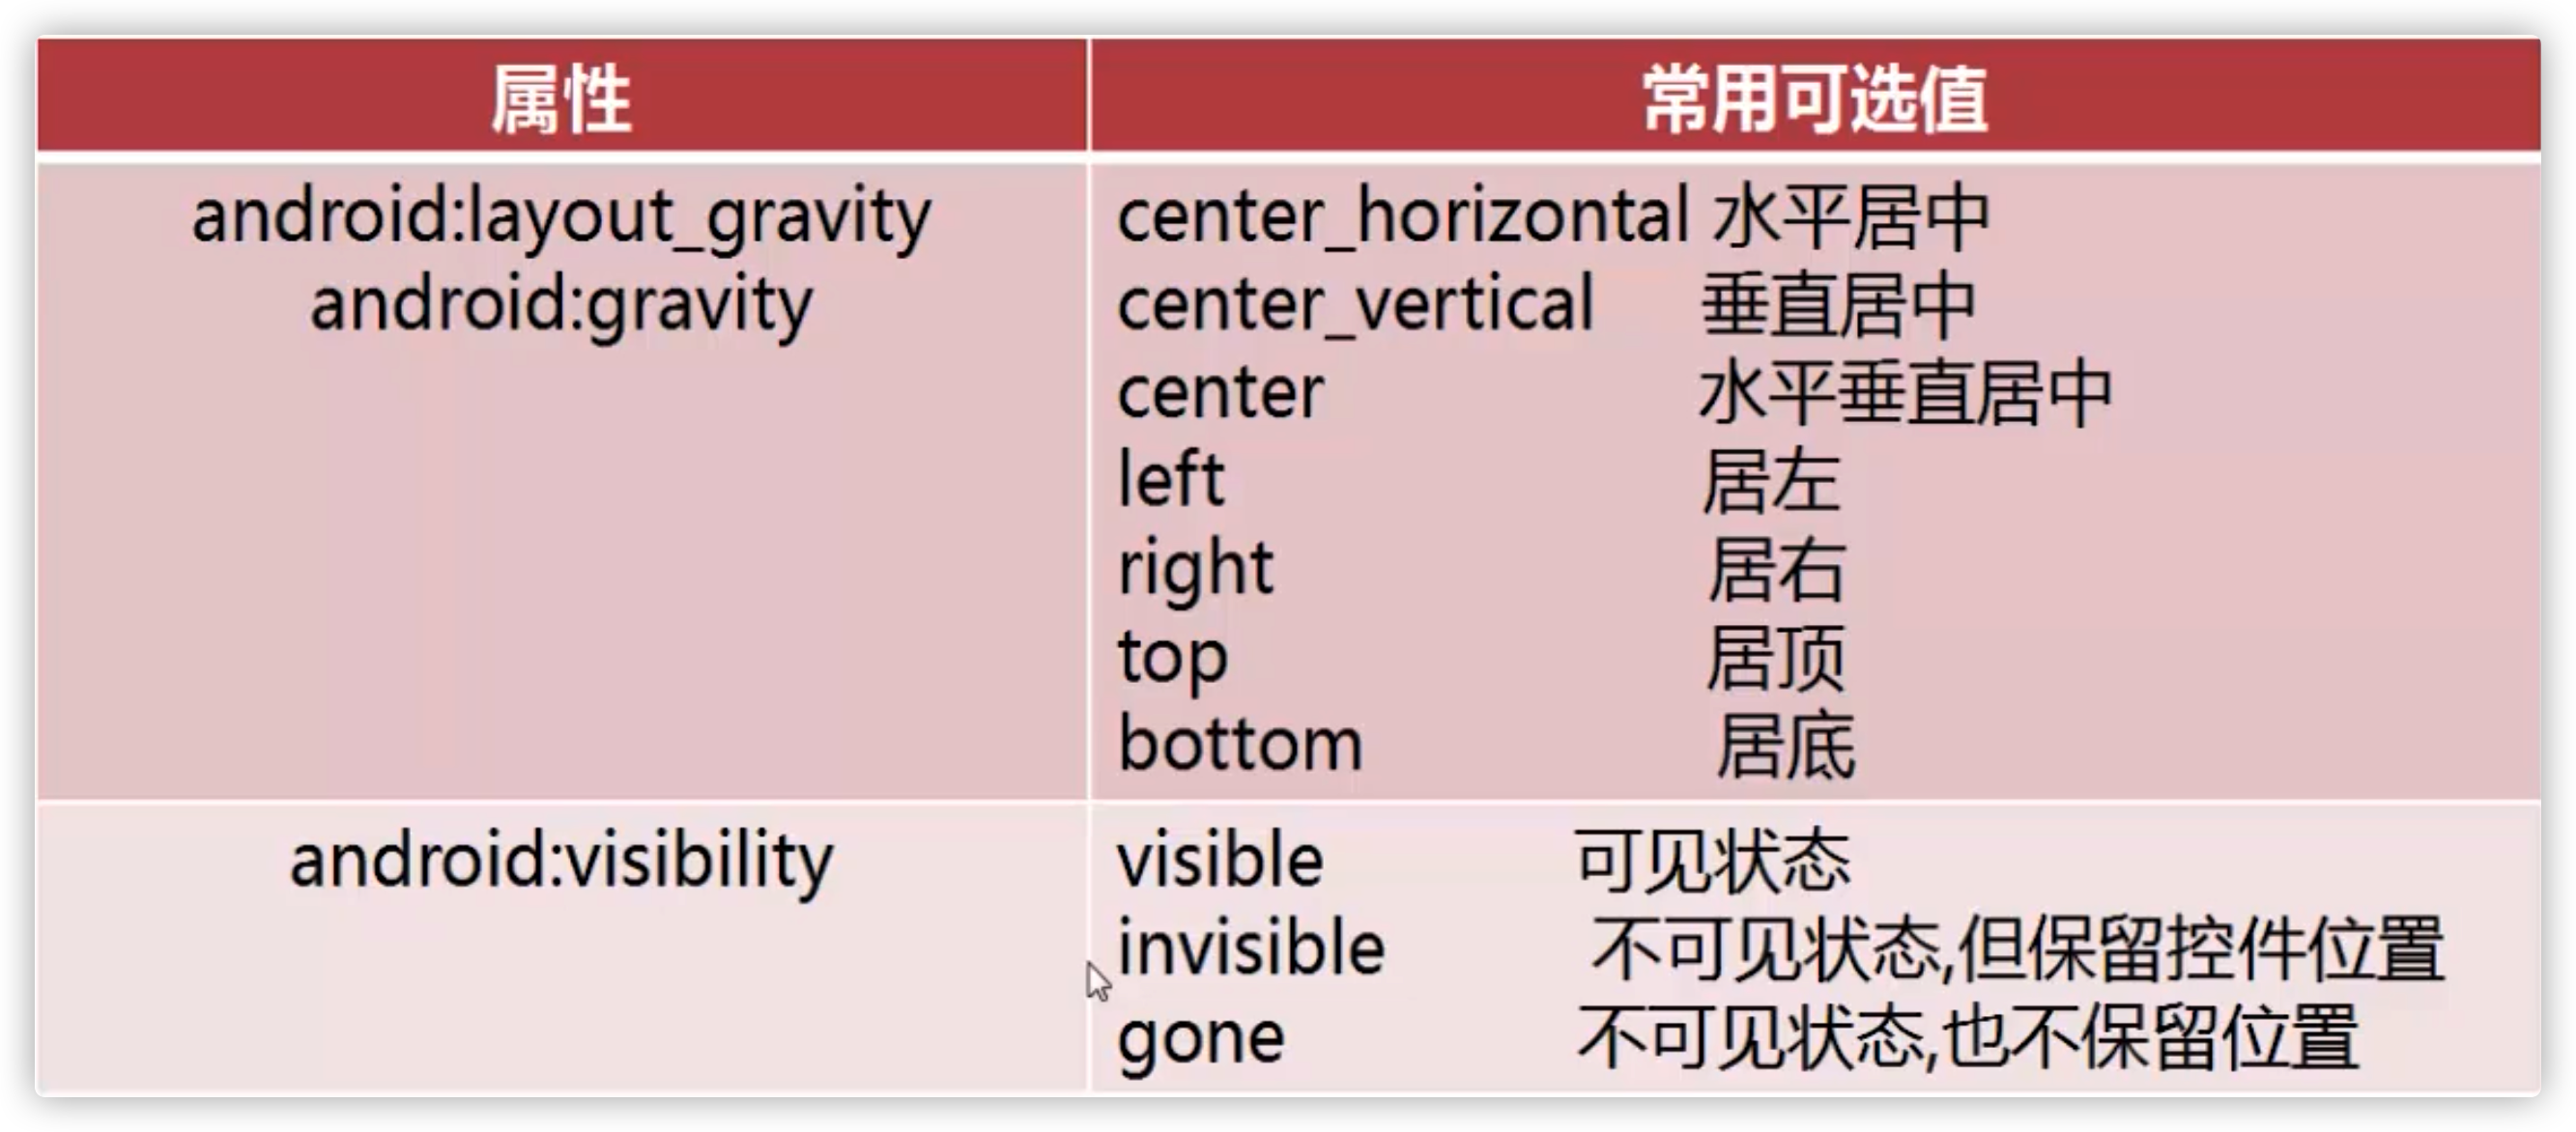
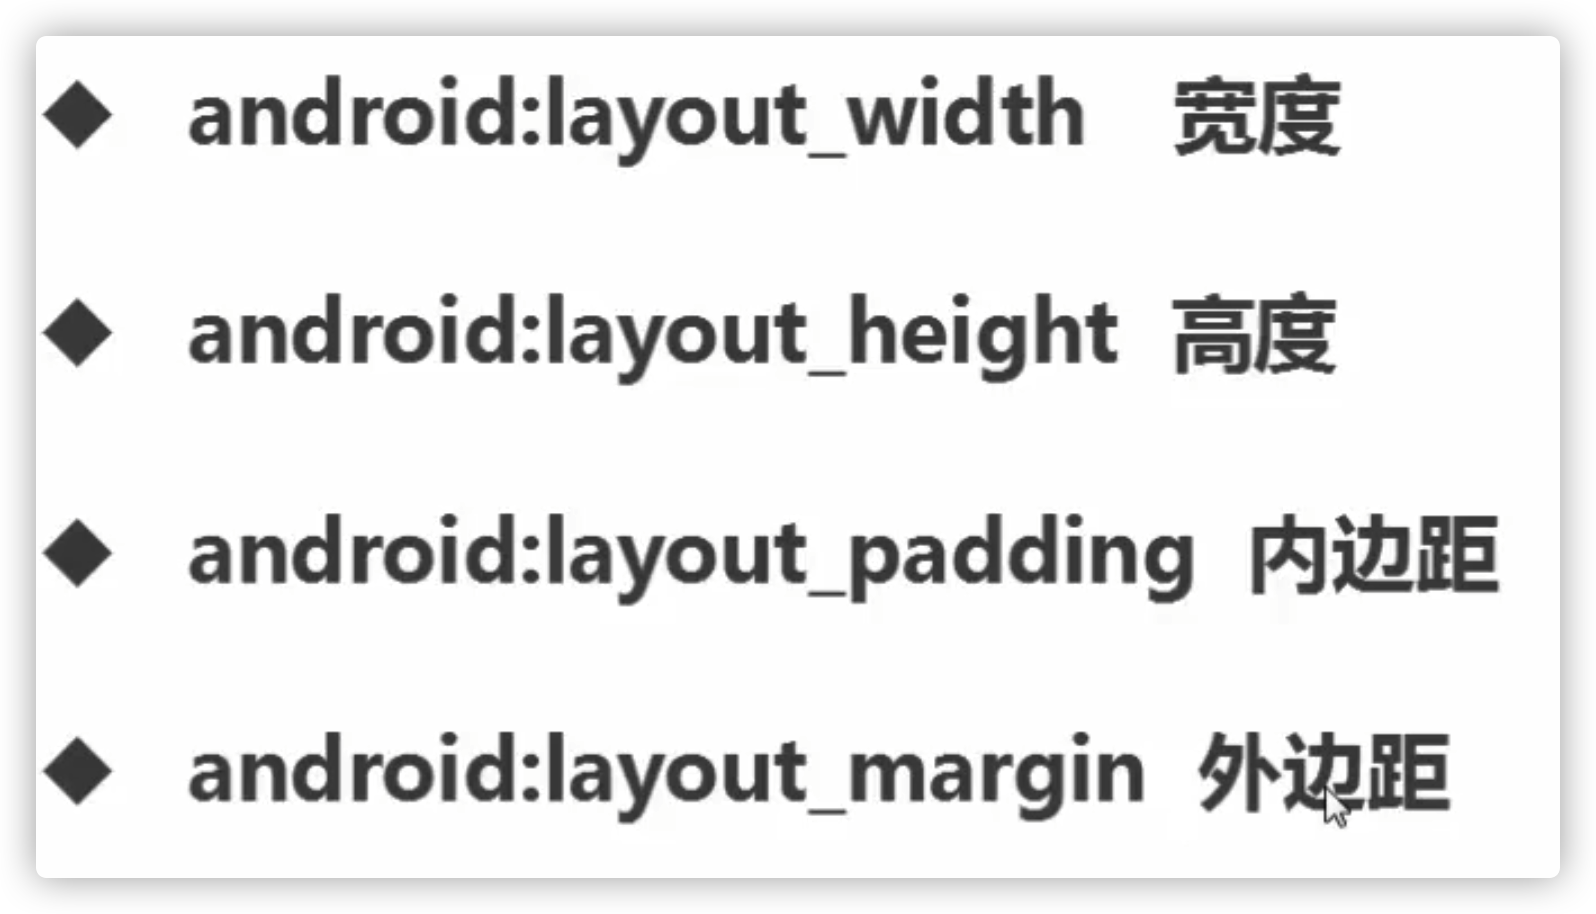
关于属性的详细请看
文档
清单文件
- 在根目录下AndroidManifest.xml
- 项目全局配置
- 每个activity都需要在这里配置,当然大部分时候ide自动配置就行
- 在 里设置为主页面和启动页面
1
2
3
4
5
6
7
| <activity android:name=".MainActivity">
<intent-filter>
<action android:name="android.intent.action.MAIN" />
<category android:name="android.intent.category.LAUNCHER" />
</intent-filter>
</activity>
|
常用布局
一些常用的布局介绍
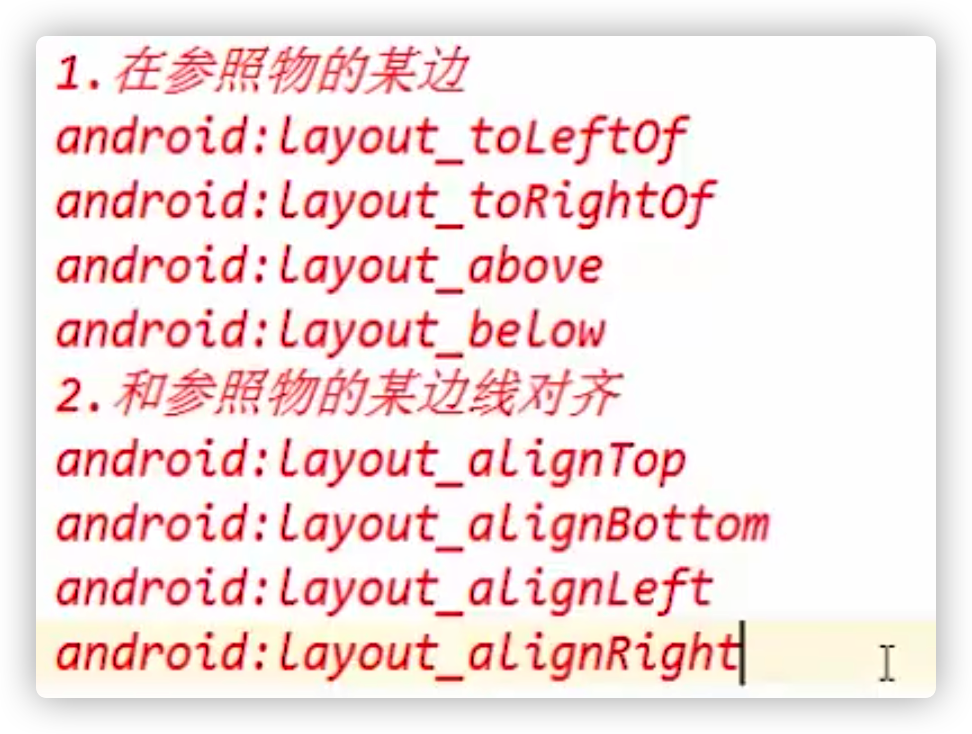
Match_parent:和父容器一致,也就是说尽可能填满父容器
wrap_content:包裹内容,大小取决于内部组件大小,但是不会超过屏幕
dp像素 字体用sp
线性布局
1
2
3
4
5
6
7
8
9
10
11
12
13
14
15
16
17
18
| <LinearLayout
android:layout_width="match_parent"
android:layout_height="wrap_content"
android:orientation="horizontal">
<TextView
android:layout_width="0dp"
android:layout_height="wrap_content"
android:text="@string/fuck_you"
android:layout_weight="1"
android:background="#ff0000"/>
<TextView
android:layout_width="0dp"
android:layout_height="wrap_content"
android:text="@string/fuck_you"
android:layout_weight="2"
android:background="#00ff00"/>
</LinearLayout>
|

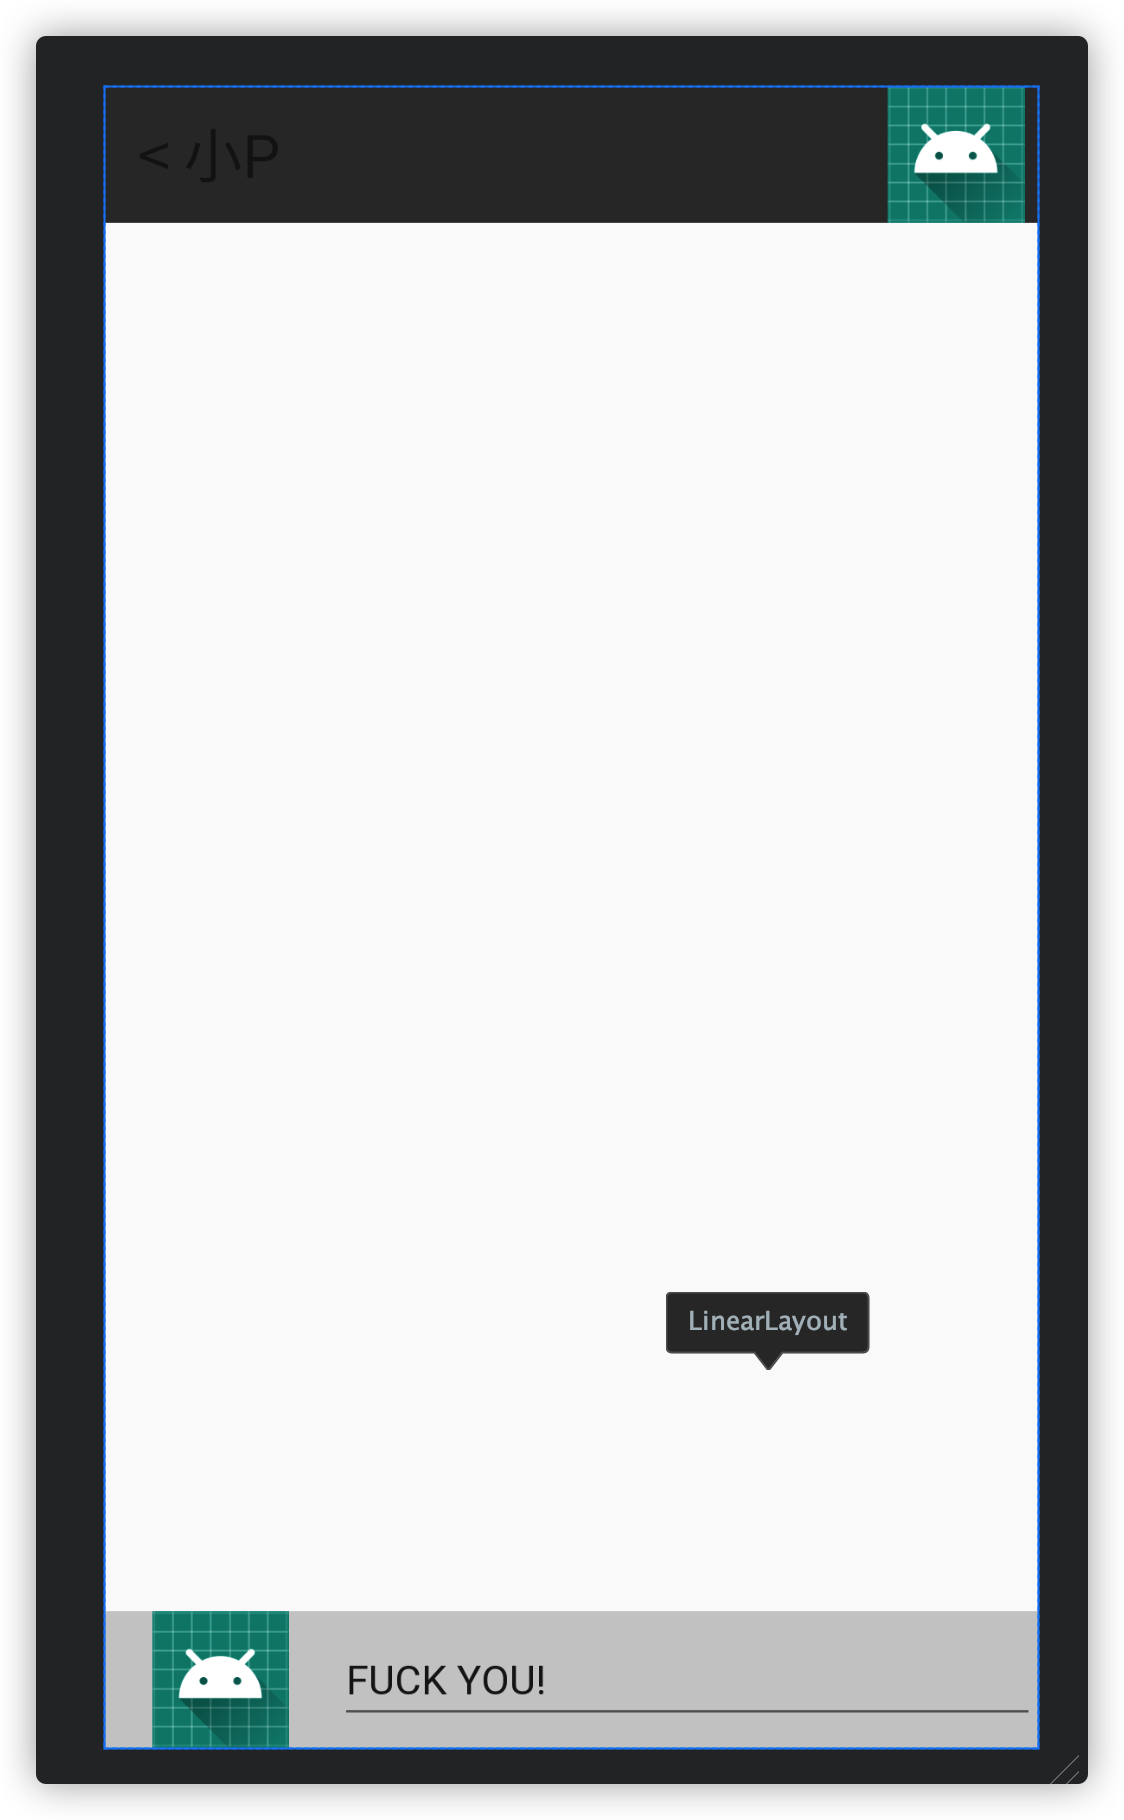
权重
重力
- 使用layout_gravity属性设置重力
- 直观理解就是对于当前组件所在容器的重力方向进行设置
- 组件就会向重力的方向对齐
例子
1
2
3
4
5
6
7
8
9
10
11
12
13
14
15
16
17
18
19
20
21
22
23
24
25
26
27
28
29
30
31
32
33
34
35
36
37
38
39
40
41
42
43
44
45
46
47
| <?xml version="1.0" encoding="utf-8"?>
<LinearLayout xmlns:android="http://schemas.android.com/apk/res/android"
android:orientation="vertical" android:layout_width="match_parent"
android:layout_height="match_parent">
<LinearLayout
android:layout_width="match_parent"
android:layout_height="60dp"
android:orientation="horizontal"
android:background="#333333">
<TextView
android:layout_width="0dp"
android:layout_height="wrap_content"
android:text="< 小P"
android:textSize="26sp"
android:layout_gravity="center_vertical"
android:paddingLeft="15sp"
android:layout_weight="1"/>
<ImageView
android:layout_width="wrap_content"
android:layout_height="wrap_content"
android:src="@mipmap/ic_launcher_round"/>
</LinearLayout>
<LinearLayout
android:layout_width="match_parent"
android:layout_height="match_parent"
android:orientation="horizontal"
android:layout_weight="1">
</LinearLayout>
<LinearLayout
android:layout_width="match_parent"
android:layout_height="60dp"
android:background="#cccccc"
android:orientation="horizontal">
<ImageView
android:layout_width="0dp"
android:layout_height="wrap_content"
android:src="@mipmap/ic_launcher_round"
android:layout_weight="1"
/>
<EditText
android:layout_width="0dp"
android:layout_height="wrap_content"
android:layout_gravity="center_vertical"
android:layout_weight="3"
android:text="@string/fuck_you"/>
</LinearLayout>
</LinearLayout>
|
相对布局
相对布局的每个组件需要参照物,比如父容器,其他组件
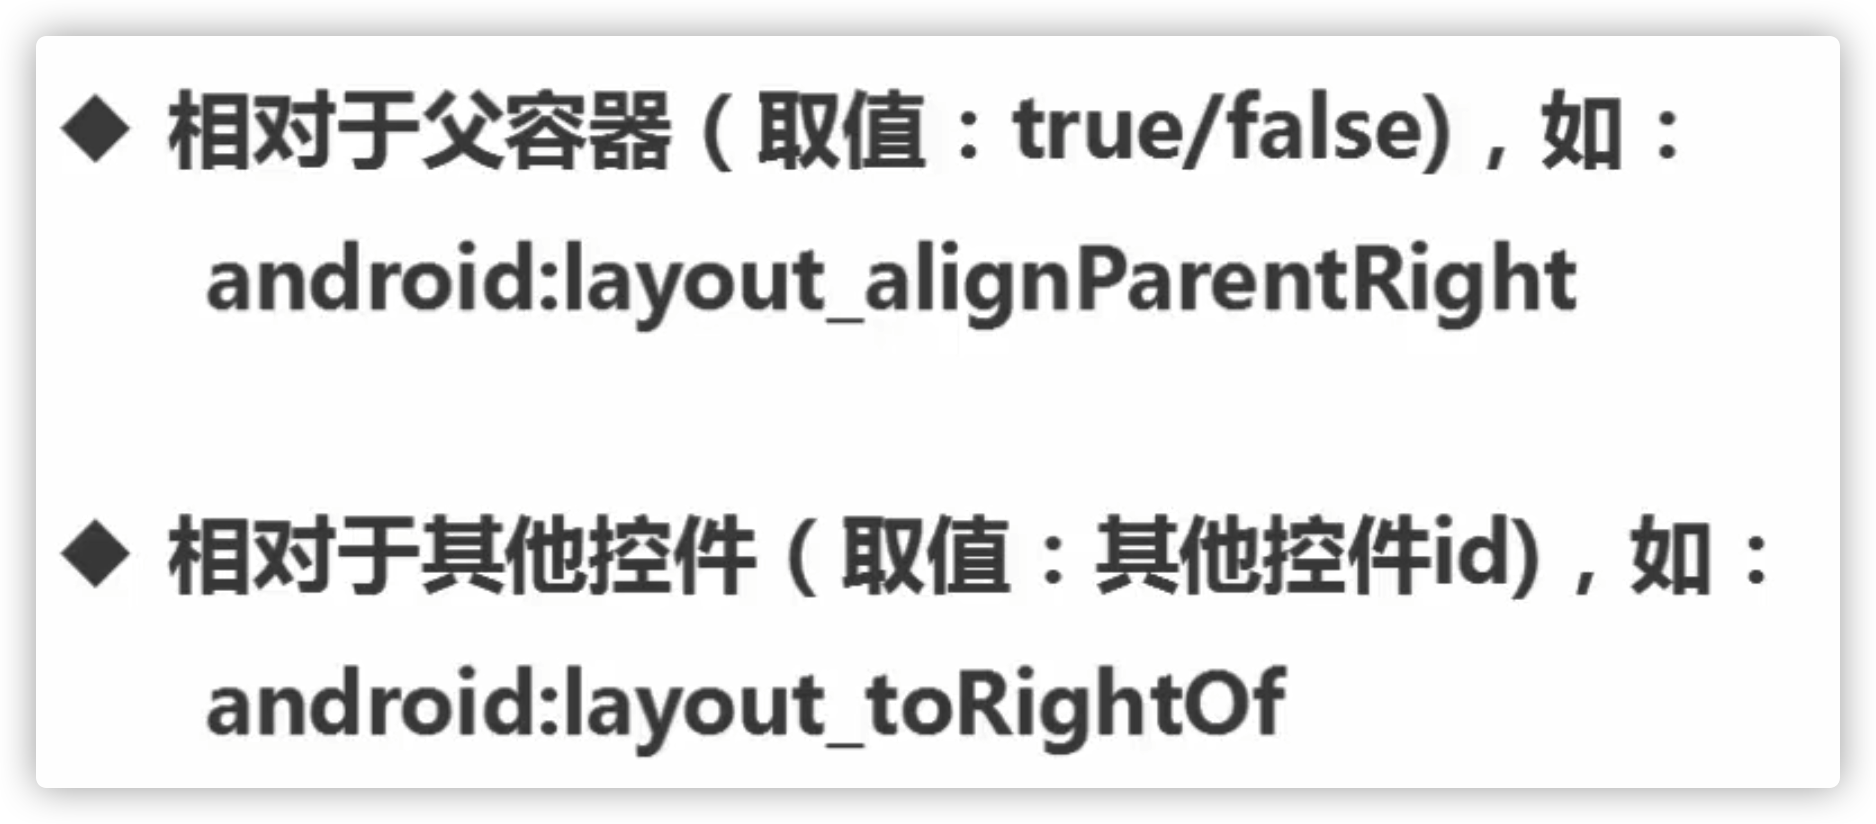

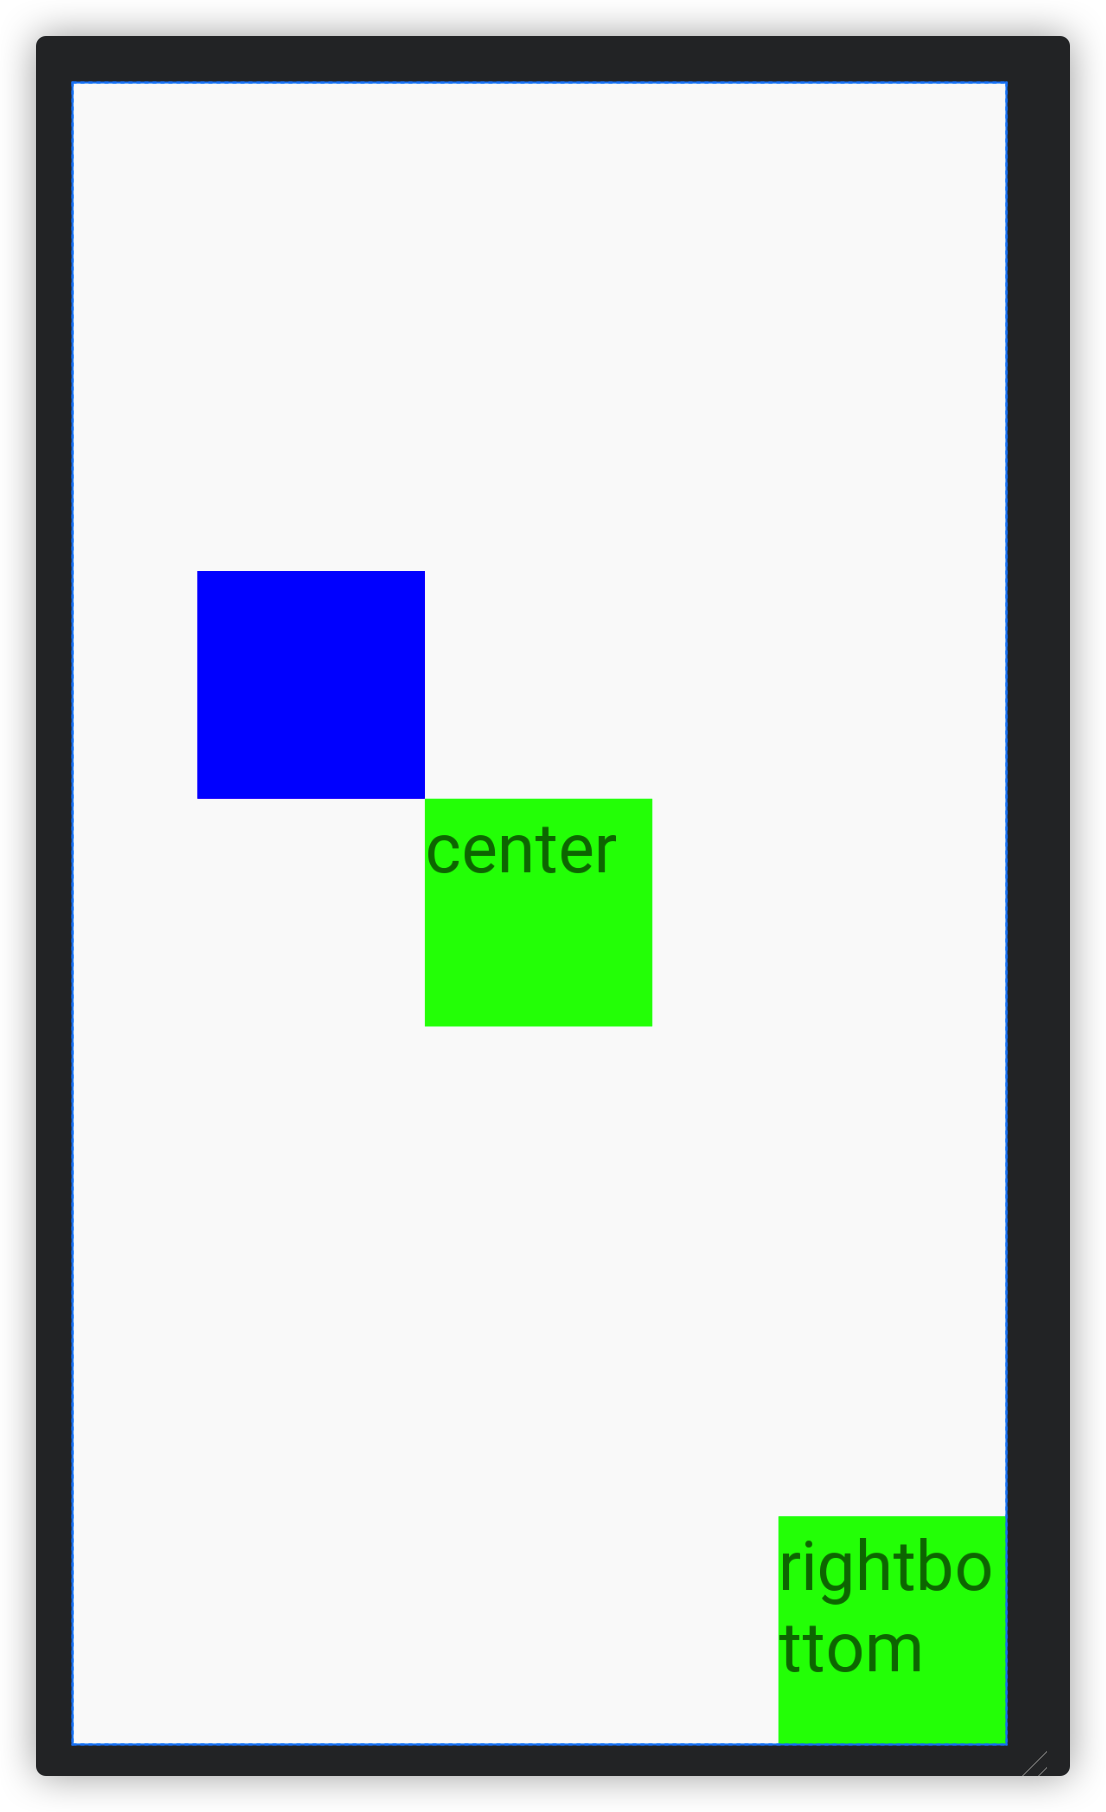
例子:
1
2
3
4
5
6
7
8
9
10
11
12
13
14
15
16
17
18
19
20
21
22
23
24
25
26
27
| <?xml version="1.0" encoding="utf-8"?>
<RelativeLayout xmlns:android="http://schemas.android.com/apk/res/android"
android:layout_width="match_parent" android:layout_height="match_parent">
<TextView
android:layout_width="100dp"
android:layout_height="100dp"
android:id="@+id/center"
android:textSize="30dp"
android:text="center"
android:background="#00ff00"
android:layout_centerInParent="true"/>
<TextView
android:layout_width="100dp"
android:layout_height="100dp"
android:layout_alignParentRight="true"
android:layout_alignParentBottom="true"
android:text="rightbottom"
android:textSize="30dp"
android:background="#00ff00"/>
<TextView
android:layout_width="100dp"
android:layout_height="100dp"
android:layout_above="@+id/center"
android:background="#0000ff"
android:layout_toLeftOf="@+id/center"/>
</RelativeLayout>
|
1
2
3
4
5
6
7
8
9
10
11
12
13
14
15
16
17
18
19
20
21
22
23
24
25
26
27
28
29
30
31
32
33
34
35
36
37
38
39
40
41
42
43
44
45
46
47
48
49
50
51
52
53
54
55
56
57
58
59
60
61
62
63
64
65
66
67
68
69
70
71
72
73
74
75
76
77
78
79
80
81
82
83
84
85
86
87
88
89
90
91
92
93
94
95
96
97
98
99
100
101
102
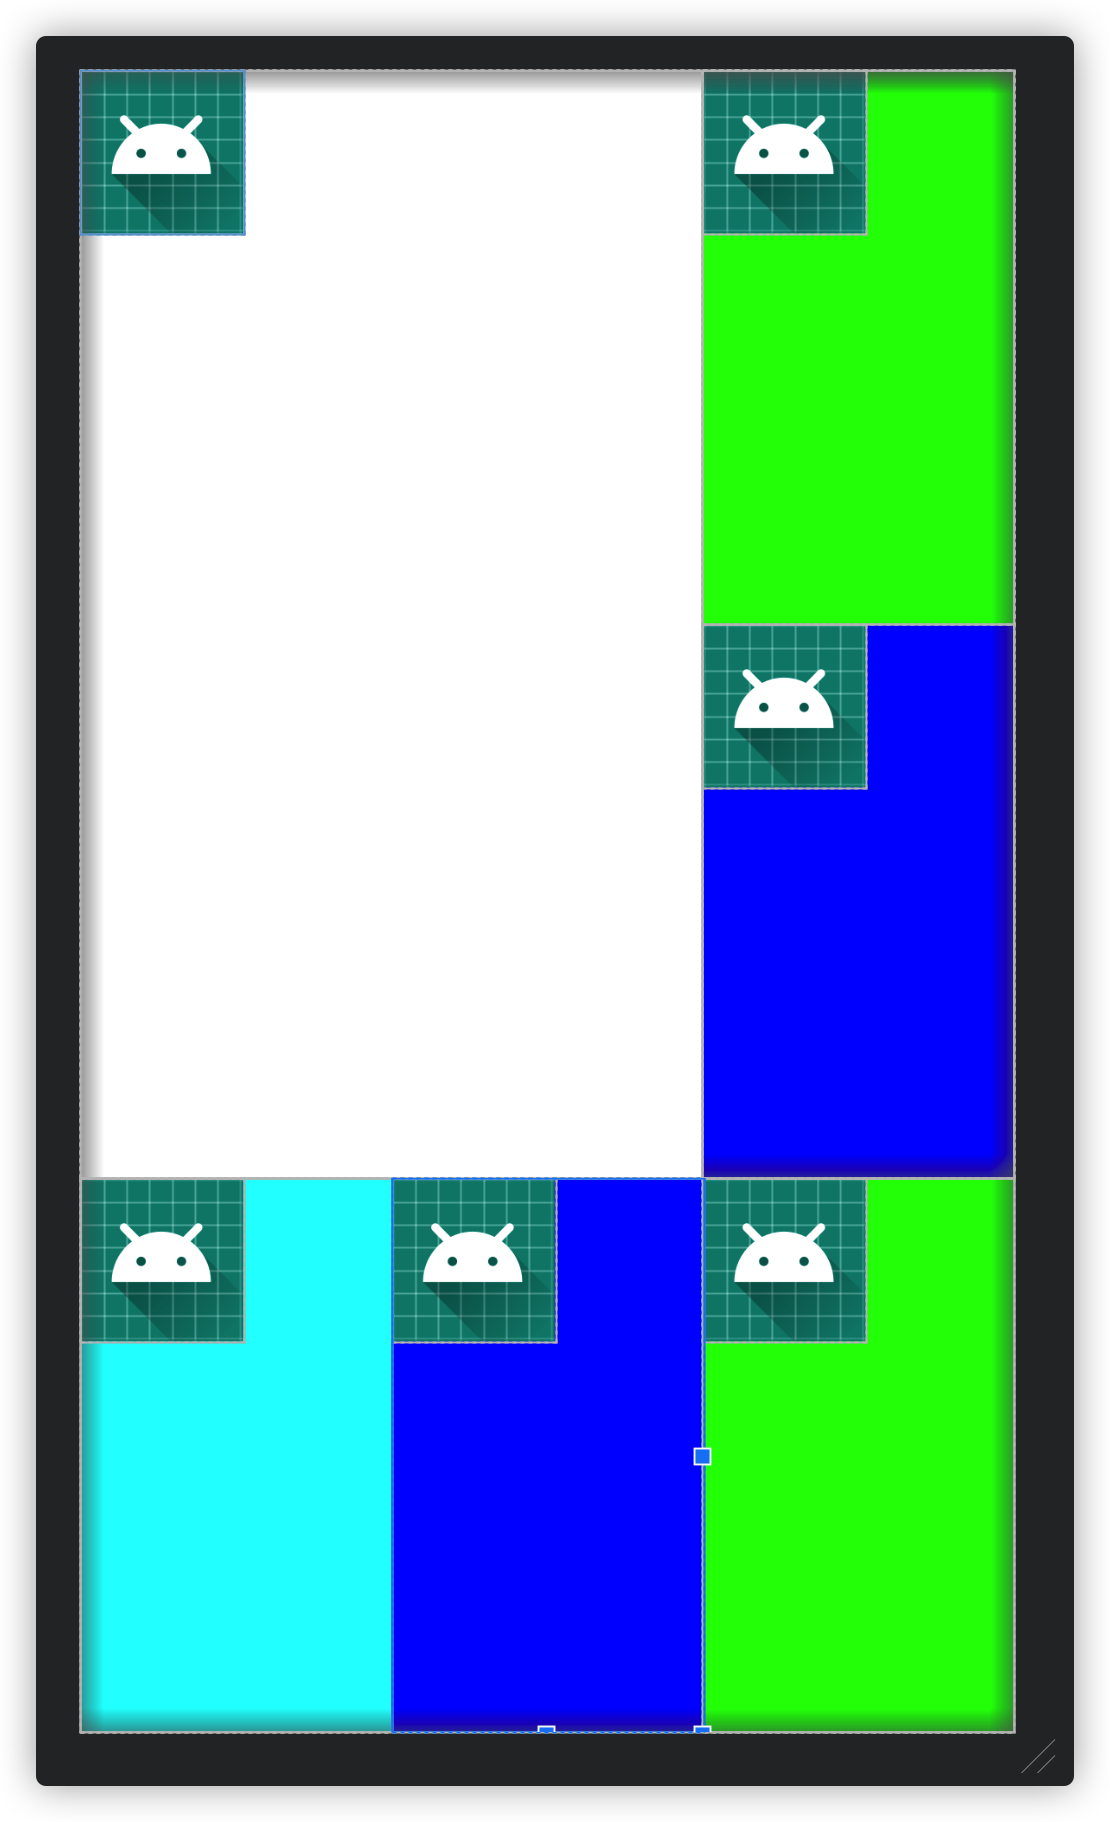
| <?xml version="1.0" encoding="utf-8"?>
<LinearLayout xmlns:android="http://schemas.android.com/apk/res/android"
android:layout_width="match_parent"
android:layout_height="match_parent"
android:orientation="vertical">
<LinearLayout
android:layout_width="match_parent"
android:layout_height="0dp"
android:layout_weight="2"
android:background="#ff0000"
android:orientation="horizontal">
<RelativeLayout
android:layout_width="0dp"
android:layout_height="match_parent"
android:layout_weight="2"
android:background="#ffffff">
<androidx.appcompat.widget.AppCompatImageView
android:layout_width="wrap_content"
android:layout_height="wrap_content"
android:src="@mipmap/ic_launcher_round" />
</RelativeLayout>
<LinearLayout
android:layout_width="0dp"
android:layout_height="match_parent"
android:layout_weight="1"
android:background="#ff00ff"
android:orientation="vertical">
<RelativeLayout
android:layout_width="match_parent"
android:layout_height="0dp"
android:layout_weight="1"
android:background="#00ff00">
<androidx.appcompat.widget.AppCompatImageView
android:layout_width="wrap_content"
android:layout_height="wrap_content"
android:src="@mipmap/ic_launcher_round" />
</RelativeLayout>
<RelativeLayout
android:layout_width="match_parent"
android:layout_height="0dp"
android:layout_weight="1"
android:background="#0000ff">
<androidx.appcompat.widget.AppCompatImageView
android:layout_width="wrap_content"
android:layout_height="wrap_content"
android:src="@mipmap/ic_launcher_round" />
</RelativeLayout>
</LinearLayout>
</LinearLayout>
<LinearLayout
android:layout_width="match_parent"
android:layout_height="0dp"
android:layout_weight="1"
android:background="#00ff00"
android:orientation="horizontal">
<RelativeLayout
android:layout_width="0dp"
android:layout_height="match_parent"
android:layout_weight="1"
android:background="#00ffff">
<androidx.appcompat.widget.AppCompatImageView
android:layout_width="wrap_content"
android:layout_height="wrap_content"
android:src="@mipmap/ic_launcher_round" />
</RelativeLayout>
<RelativeLayout
android:layout_width="0dp"
android:layout_height="match_parent"
android:layout_weight="1"
android:background="#0000ff">
<androidx.appcompat.widget.AppCompatImageView
android:layout_width="wrap_content"
android:layout_height="wrap_content"
android:src="@mipmap/ic_launcher_round" />
</RelativeLayout>
<RelativeLayout
android:layout_width="0dp"
android:layout_height="match_parent"
android:layout_weight="1"
android:background="#00ff00">
<androidx.appcompat.widget.AppCompatImageView
android:layout_width="wrap_content"
android:layout_height="wrap_content"
android:src="@mipmap/ic_launcher_round" />
</RelativeLayout>
</LinearLayout>
</LinearLayout>
|
表格布局
1
2
3
4
5
6
7
8
9
10
| <TableLayout xmlns:android="http://schemas.android.com/apk/res/android"
android:layout_width="match_parent" android:layout_height="match_parent">
<TableRow>
<Button/>
</TableRow>
<TableRow>
<Button/>
</TableRow>
</TableLayout>
|
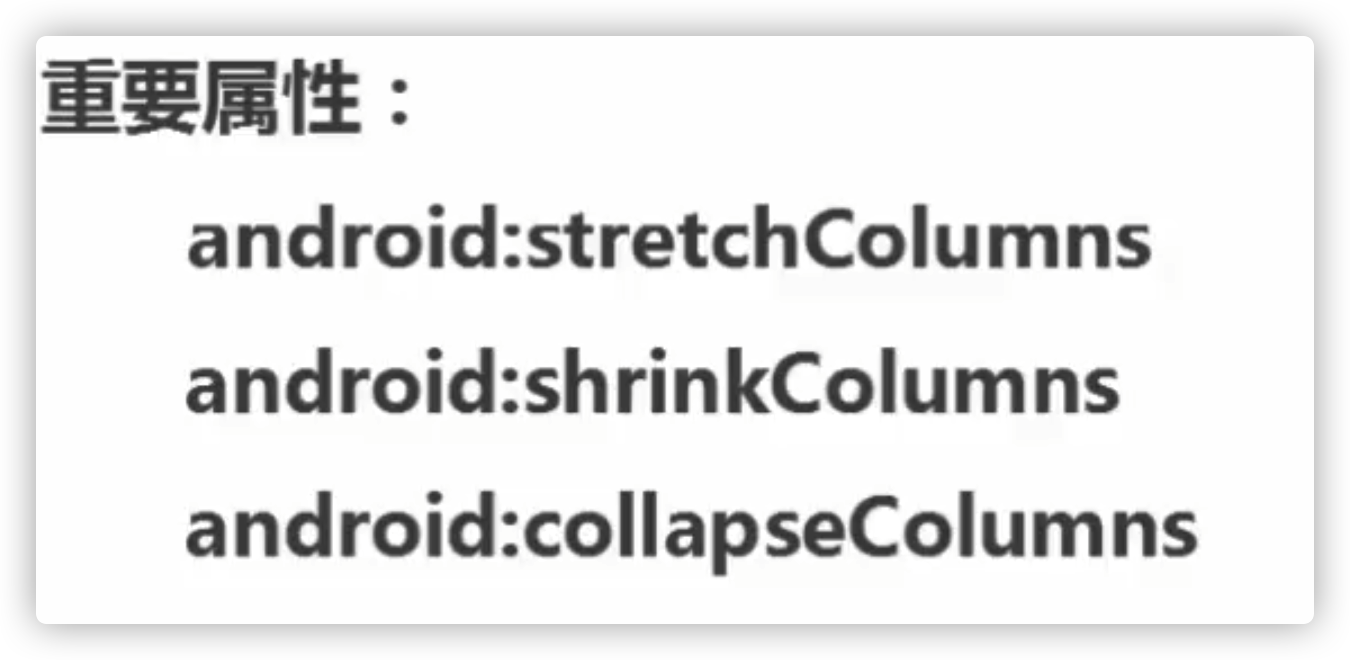
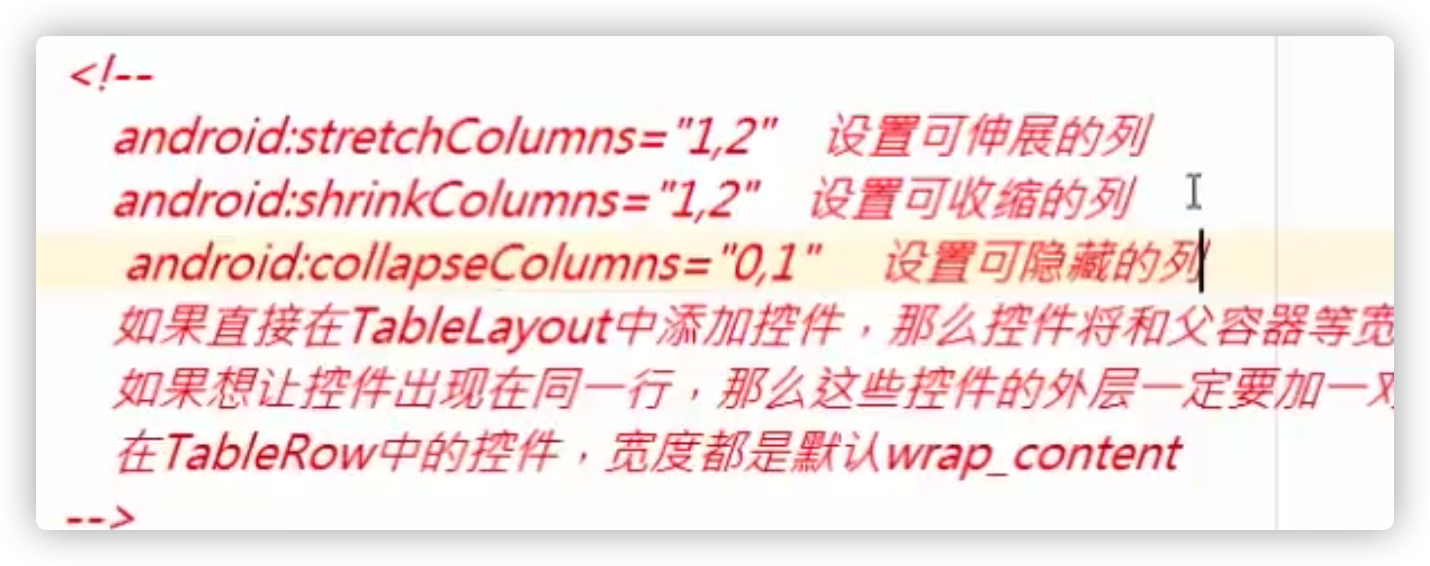
行和列显而易见
1
| android:stretchColumns="0,1,2"
|
帧布局
感觉没啥用,先放着
网格布局
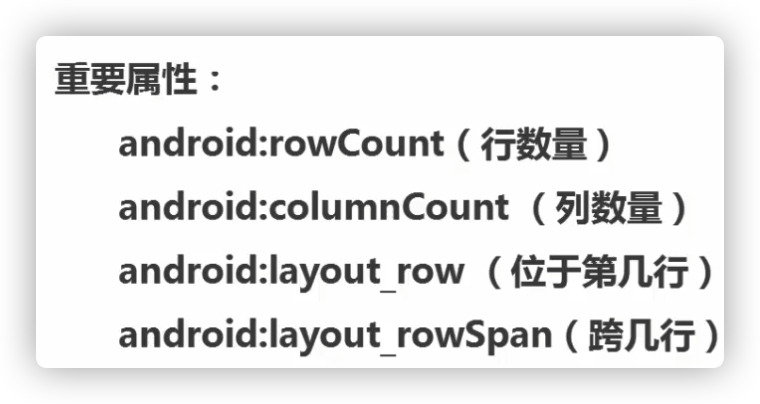
直接定义行和列数
1
2
3
4
5
6
7
8
9
10
11
| <GridLayout xmlns:android="http://schemas.android.com/apk/res/android"
android:layout_width="wrap_content" android:layout_height="wrap_content"
android:rowCount="2"
android:columnCount="2">
<Button android:layout_columnSpan="2"
android:layout_gravity="fill"
/>
<Button/>
<Button/>
</GridLayout>
|


